
01
Prepare your syringe
Take your spore/culture syringe and shake it vigorously for 10 seconds. Remove the syringe cap by twisting. Fit the sterile needle onto the syringe, but DO NOT REMOVE THE COVER.

Product guidesMushPro MonoTub
All the essentials for setting up, maintaining and fruiting your MonoTub
Start the guideFrom preparing your grain spawn and mixing your substrate to fruiting and harvesting your mushrooms, this guide breaks the process down into five simple stages to help you get the best results from your MonoTub Kit.
Before getting started, take a moment to read through the full guide. Cleanliness and sterile technique are especially important during the early stages and can make all the difference to a successful grow.
MushPro MonoTub kit · Spore or culture syringe · Gloves and face mask · 70% isopropyl alcohol and sterile wipes · A clean, draught-free work area
For the inoculation phase, you want to be in a nice sanitary environment, or as clean as you can possibly find. A kitchen surface wiped down with 70% isopropyl alcohol will do the job. Make sure to eliminate as much draft as possible from your work space.
Apply the gloves and face mask that are provided. Sanitise your hands and arms as well as the area that you are working in.
Take your spore/culture syringe and shake it vigorously for 10 seconds. Remove the syringe cap by twisting. Fit the sterile needle onto the syringe, but DO NOT REMOVE THE COVER.
If you have been storing the bag in the fridge, let it sit at room temperature (>20°C) for 1 hour or so prior to inoculating. Make sure to mix the grain gently in the bag prior to inoculation. This allows for an even distribution of moisture that the mycelium will love.

Wipe down the rubber injection port thoroughly with the alcohol swab provided. Allow a few seconds for the alcohol to evaporate before moving onto the next step.

Remove the cover from the syringe needle. Immediately after doing so, apply gentle pressure and pierce the sanitised injection port with the needle. Make sure to angle the needle towards the bottom of the bag, as shown above. This will help prevent the needle becoming blocked and allow you to see colonisation quicker.
Compress the syringe plunger and inject 3-6ml of solution. Remove the needle from the port. If you have any solution left inside the syringe and want to save it for later, replace the needle cap and store the syringe in the fridge. Stored this way, it will last 6+ months or more.
Congratulations! The inoculation procedure is complete and the bag is now ready for incubation.

Incubate the grain bag in a dark, warm spot. A cardboard box with some holes poked for air exchange works well. Keep the temperature between 24-27°C for optimal growth. Try not to exceed 27°C or you increase the risk of contamination, which is no bueno!
If you’re struggling to maintain a consistent temperature above 24°C, invest in a heat system such as our MushPro Incubator.

After about a week, you should start to see the first signs of colonisation. Healthy mycelium should appear first as fluffy white specs on the substrate. It can sometimes take longer than a week, so don’t panic. This is especially true if you’re using a spore syringe. Be prepared to wait! For quickest growth, use a liquid culture or agar.

Over the next 2-3 weeks, the mycelium will continue to grow and colonise the grain. Once 30% of the grain has been colonised, gently break apart the mycelium inside the bag and mix with the rest of the grain. This will drastically speed up the colonisation process.
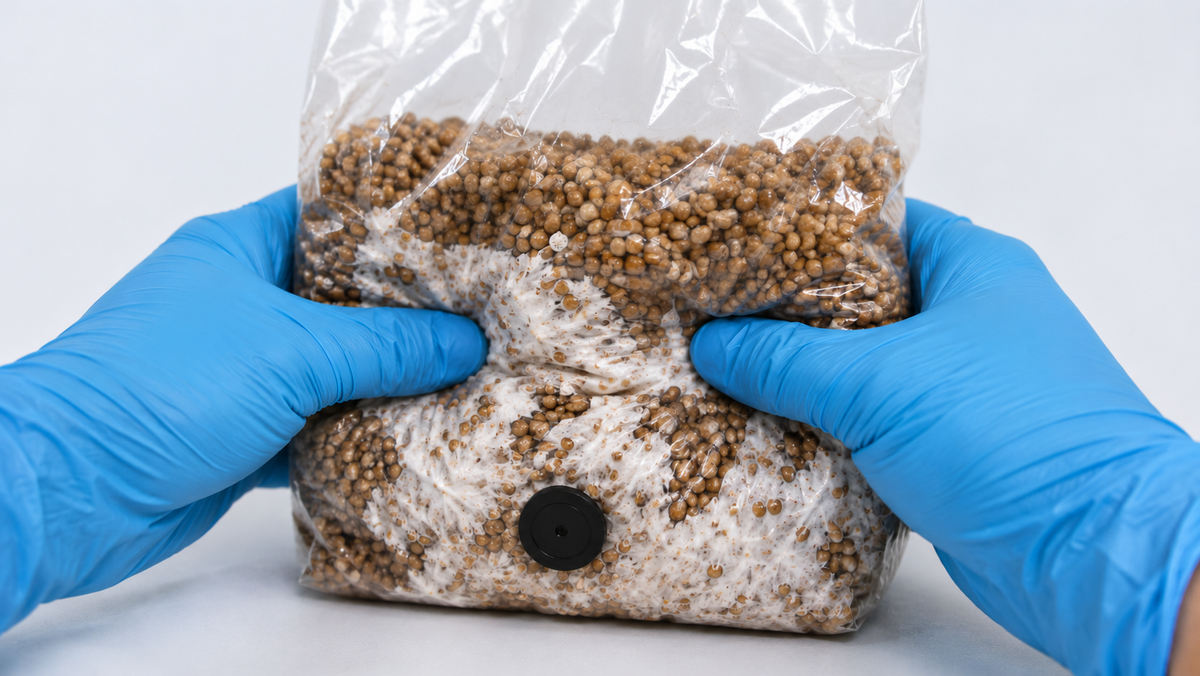
Over the next week or so, the mycelium will consume all of the grain until it forms a white ‘cake’ of mycelium spawn. Once at this stage, you’re ready to spawn.
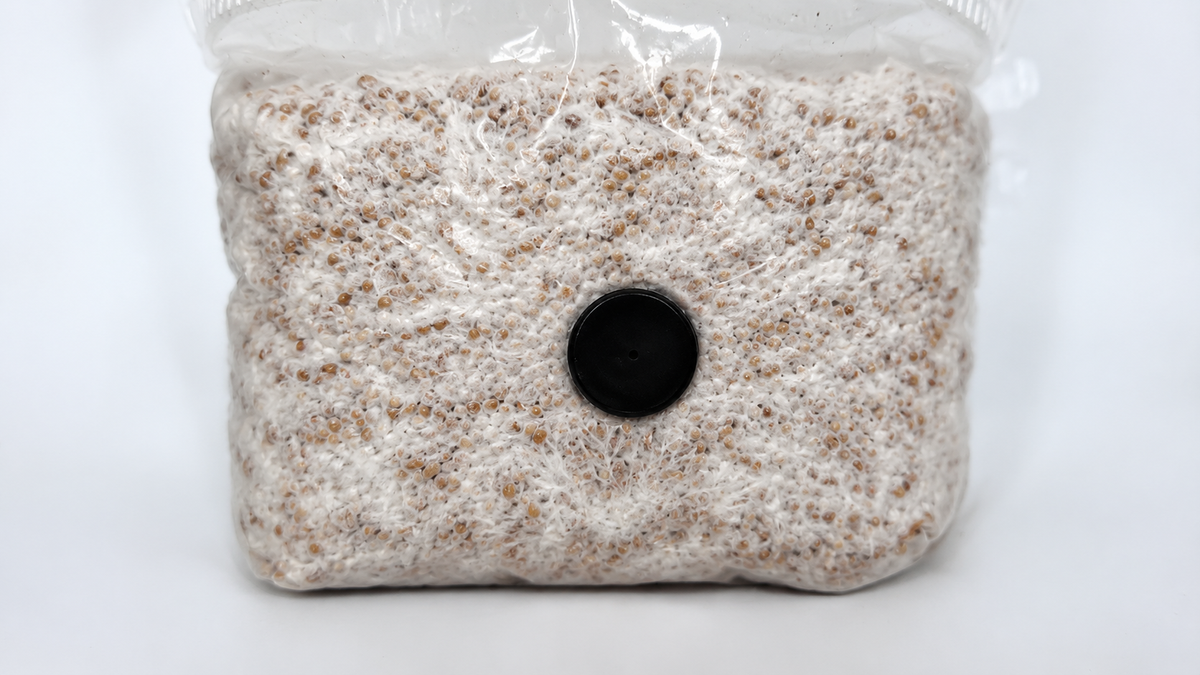
Find a nice sanitary environment, or as clean as you can possibly find. A kitchen surface wiped down with 70% isopropyl alcohol will do the job. Make sure to eliminate as much draft as possible from your work space.
Apply the gloves and face mask that are provided. Sanitise your hands and arms as well as the area that you are working in.
Using the isopropyl alcohol spray bottle and a sterile wipe, sanitise the entire MonoTub lid and base.

Using the same sterile wipe, give your colonised grain bag and your substrate bag a cautionary wipe down as well.
Once sanitised, break up the colonised grain inside the bag. Cut the top of the grain bag and dump the entire contents into the tray. Do the same with the substrate bag, but save around 1/4 of the substrate to do a casing layer in the next step.
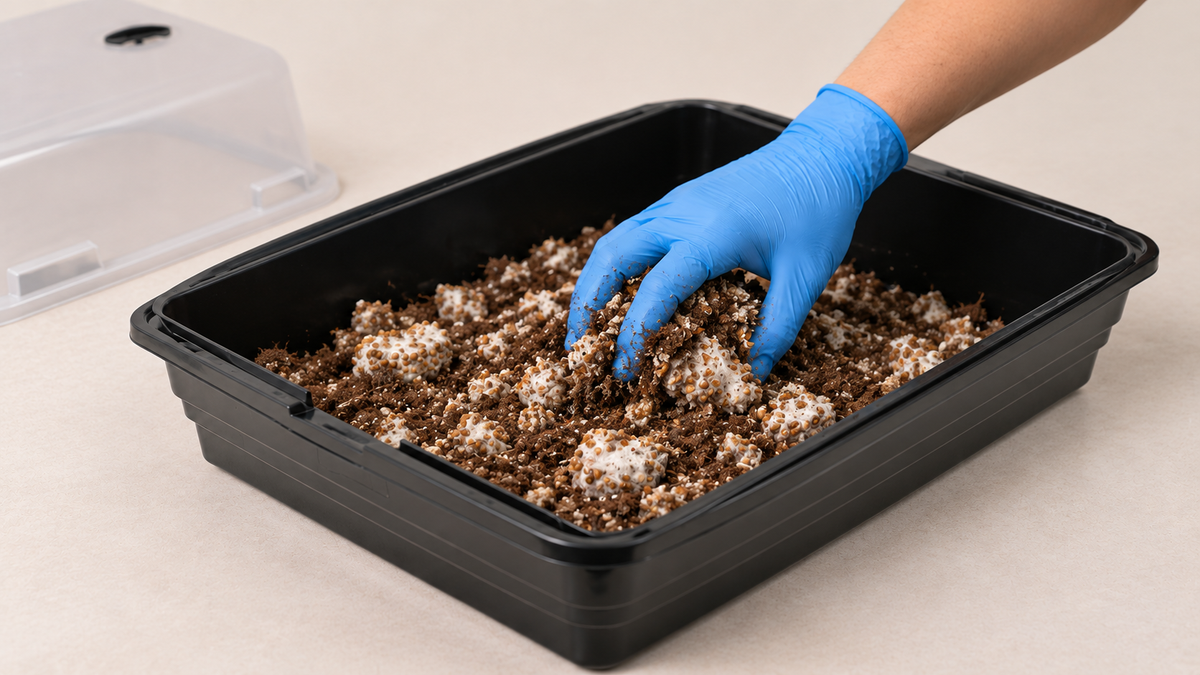
Mix the grain and substrate evenly together inside the tray. Once mixed, gently level out the substrate to create an even, flat surface. Take your time with this step to make the surface as level as you can. You’ll be rewarded for your efforts with more mushrooms! Make sure not to compress or pack down the substrate too much.

Now apply the remaining 1/4 of the substrate directly on top of the spawned grain and substrate. Do not mix with the spawned material. Think of it like icing a cake. The goal here is to create a 1-2cm casing layer with the substrate on top of your spawned mix. Again, gently level out the substrate to create an even, flat casing layer.
The casing layer will protect the mycelium underneath as it colonises. It also acts as a humidity trap, giving you much more even, full flushes. Once the casing is complete, snap the lid onto the tray.

Put your MonoTub somewhere dark and away from direct sunlight. Some ambient light is ok and can even aide colonisation, as long as its not direct sunlight. The most important thing is to keep it somewhere clean. We recommend storing the tub on a shelf in a clean area, at least a few feet above the floor. This is because most contaminates float around near the floor level. So if you keep tubs on the floor, the air circulating there will be very dirty!
During the colonisation stage, make sure to keep the vents closed to keep carbon dioxide levels high. Mycelium will colonise faster and more vigorously in high carbon dioxide environments, so use it to your advantage.
You should maintain a temperature of between 24-27°C for colonisation. After about 10 days your MonoTub should be fully colonised and ready to fruit. Don’t worry if it hasn’t fully colonised by then, it can sometimes take as long as 2/3 weeks to fully colonise. This is largely dependent on the genetics of your spawn and the incubation temperature.
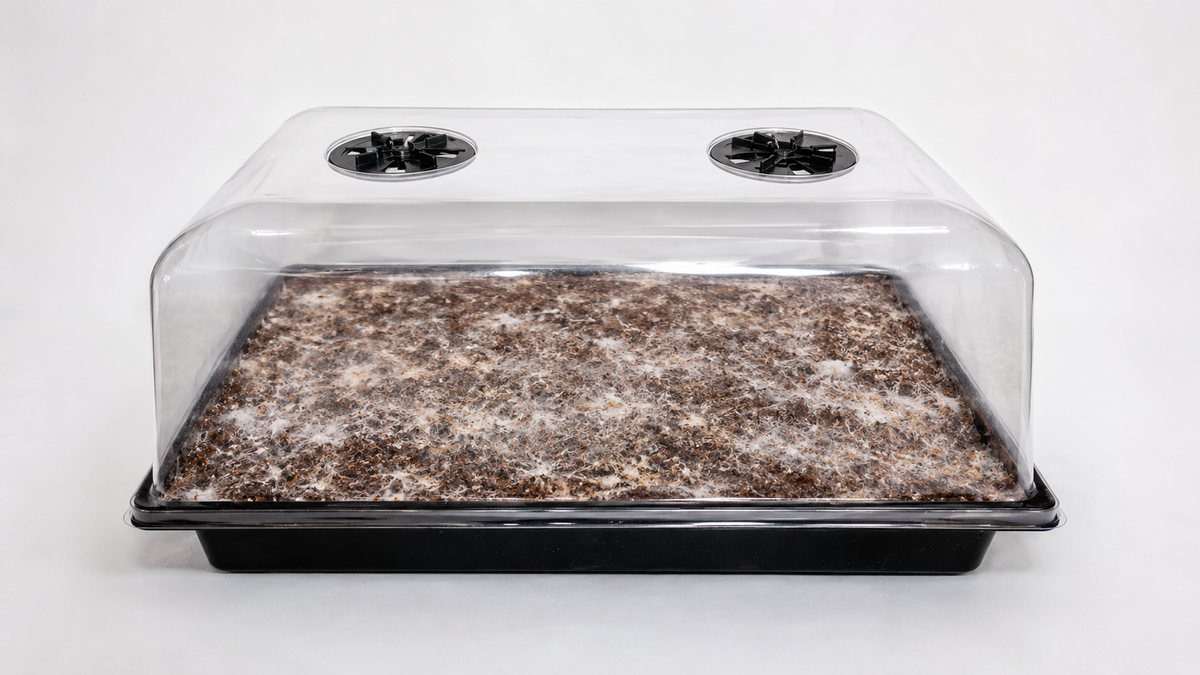
To put your MonoTub into fruiting conditions, simply open the air vents slightly (but not fully) to increase oxygen levels. Fresh air and light are the two essential triggers to initiate mushroom pinning.
Place your MonoTub in a warm spot between 21-24°C, where it can receive some indirect sunlight or room light. You want to give the substrate at least 4-6 hours of light a day. You do not need to overthink lighting as mushrooms require very little, but some is always beneficial.
For the first flush, very little misting is required. Usually a single misting directly onto the casing layer is all that is needed. If the substrate is looking dry or there is little/no condensation on the inside of the tub, misting every couple of days may be required. However, make sure not to over mist the tubs. You want some light condensation in the tubs, but definitely no big pools of water. Too much water = bacteria!
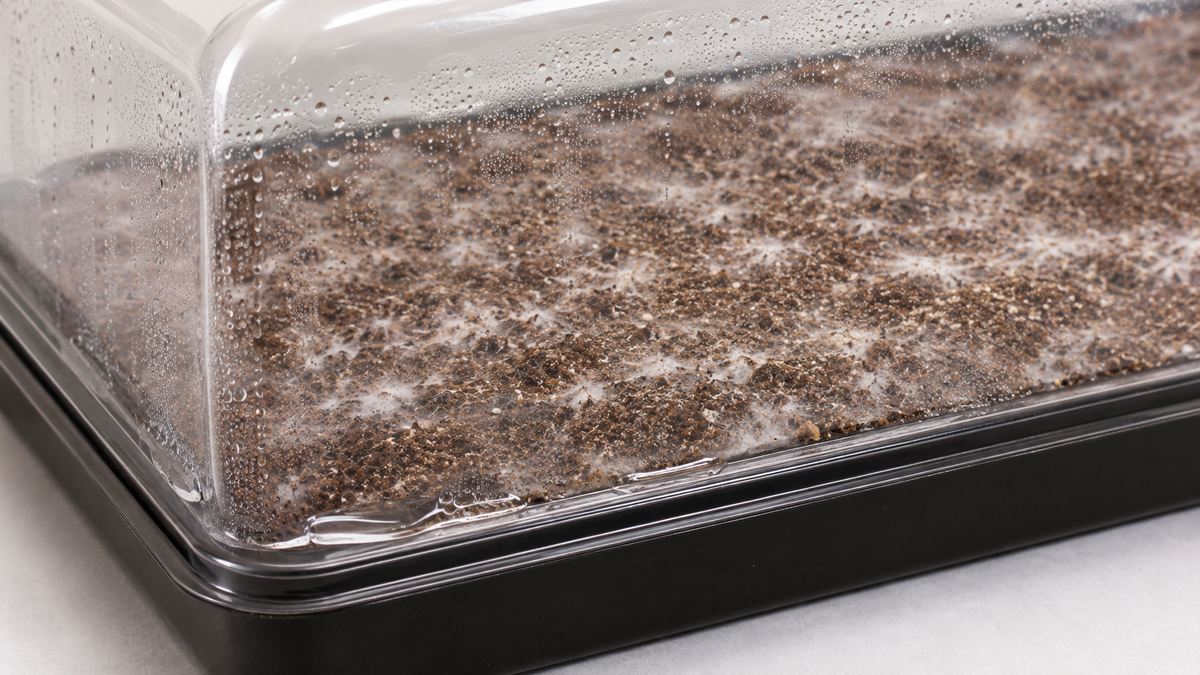
After about 14-21 days from spawning, you should see your first pins. These are baby mushrooms, that will grow and develop into mature mushroom fruiting bodies over the next few days.
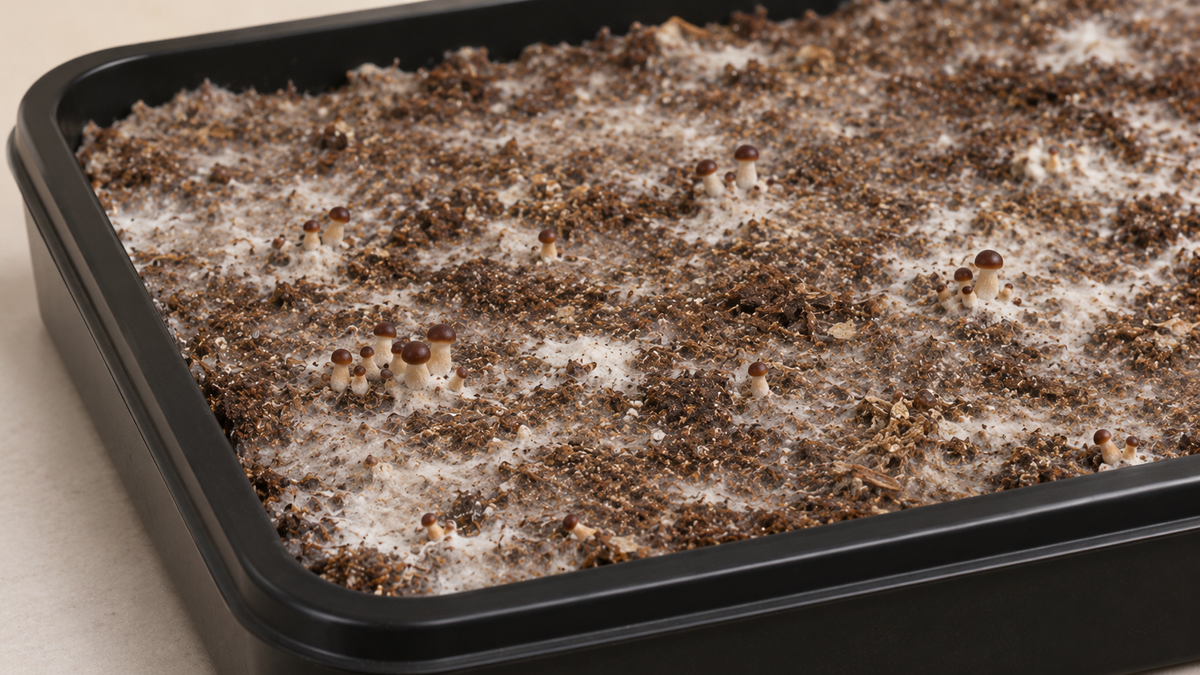
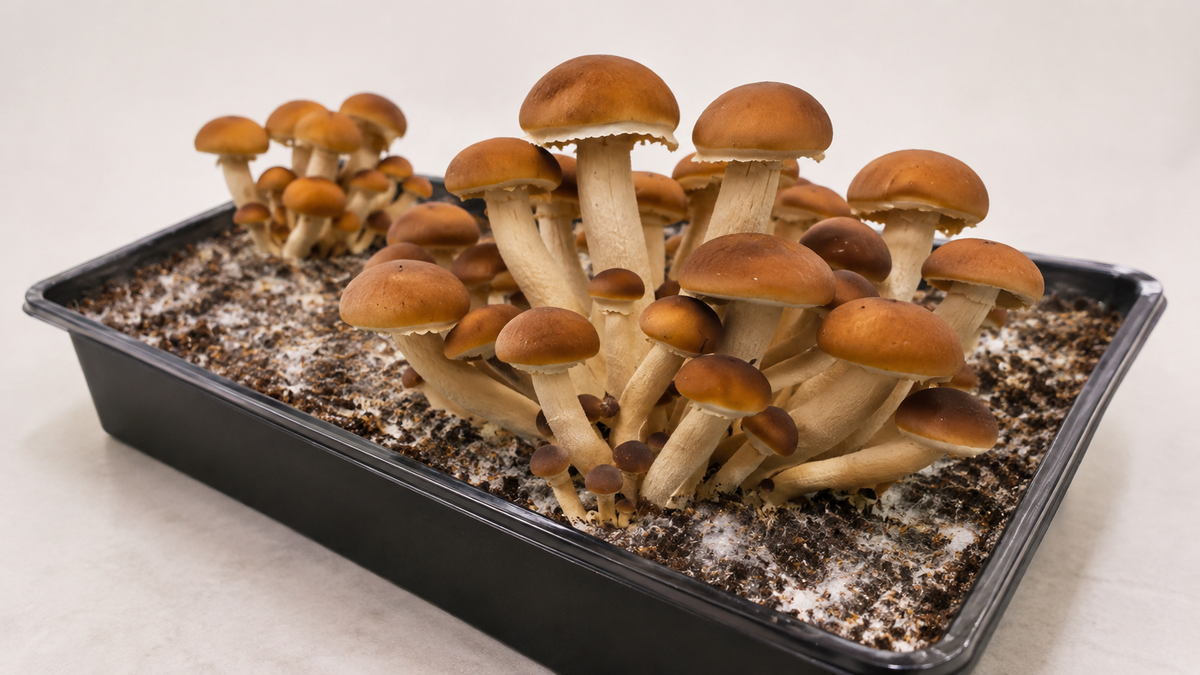
Harvest the mushrooms just as the veils start to break.
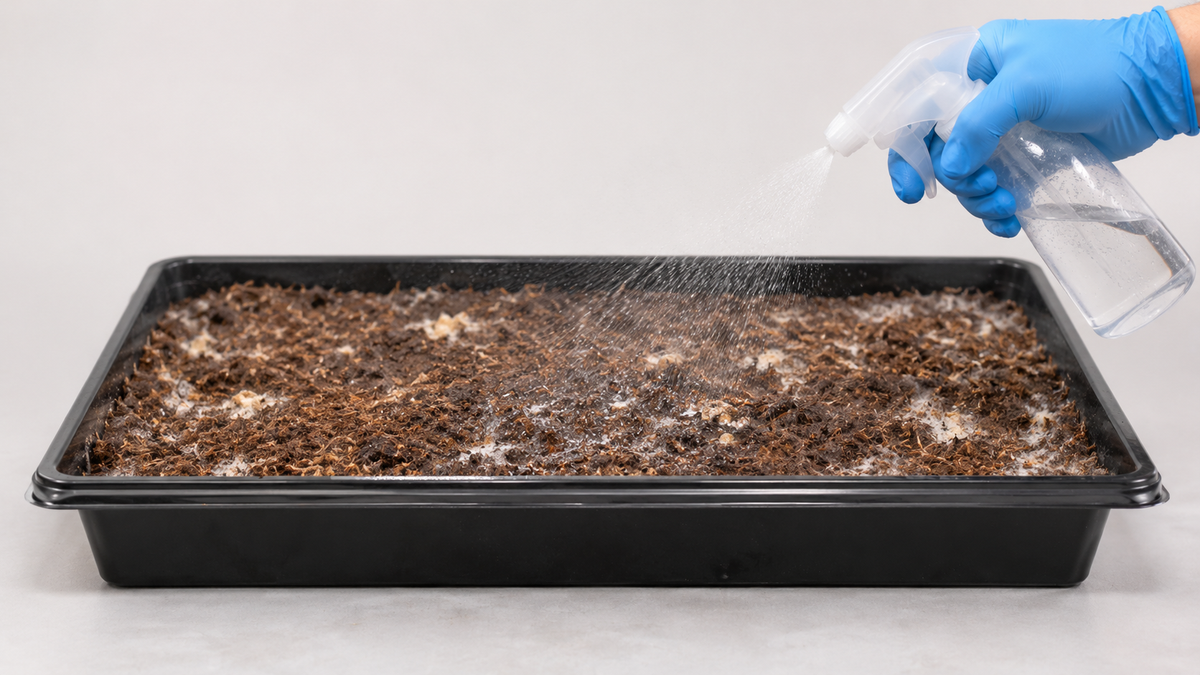
Once harvested, mist heavily directly onto the cake for 45 seconds to rehydrate it. Repeat fruiting steps 1-3 for subsequent flushes.
Expect 2 to 3 flushes (crops) of mushrooms per tub. Don’t throw the tub away after the first flush, there’s plenty more to come!
Your grow is finished once mushrooms no longer grow or the substrate eventually succumbs to contamination. Dispose of the spent substrate in a compost heap.